You can create maps under a project or subject area. You can perform source to target mappings and create mapping specifications in maps. These mapping specifications facilitate your data integration project.
To create maps, follow these steps:
- Go to Application Menu > Data Catalog > Mapping Manager.
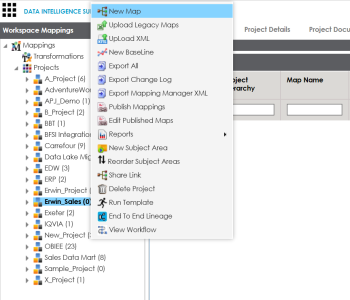
- In the Workspace Mappings pane, right-click a project or subject area.
- Click New Map.
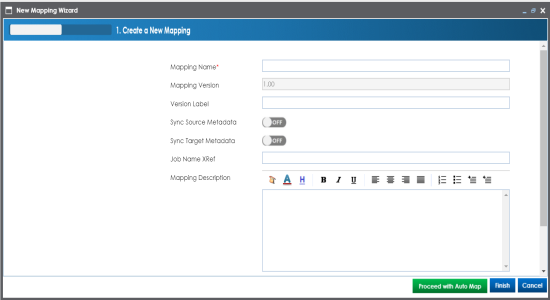
- Enter appropriate values in the fields. Fields marked with a red asterisk are mandatory. Refer to the following table for field descriptions.
- Click Finish or Proceed with Auto Map.
For example, when you right-click a project the available options appear.
The New Mapping Wizard page appears.
|
Field Name |
Description |
|---|---|
|
Mapping Name |
Specifies the mapping specification name. For example, EDW_PROD_IDS_Benefits_Detail. For more information on naming conventions, refer to the Best Practices section. |
|
Mapping Version |
Specifies the version of the mapping specification. This field is autopopulated. For example, 1.00. For more information on configuring version display of maps, refer to the Configuring Version Display topic. |
|
Sync Source Metadata |
Specifies whether source metadata syncs with the mapping. Switch Sync Source Metadata to ON to sync source metadata with the mapping. |
|
Sync Target Metadata |
Specifies whether target metadata syncs with the mapping. Switch Sync Target Metadata to ON to sync target metadata with the mapping. |
|
Mapping Description |
Specifies the description of the mapping. For example: This is a map between EDW source and IDS target systems. |
|
Mail Comments |
Specifies the mail comments, which can be sent to the project users through an email notification. For example: Source and target have identical columns, hence they can be mapped using auto-map technique. For more information on configuring notifications, refer to the Configuring Notifications topic. |
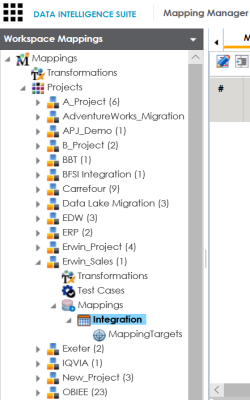
When you click Finish, a map is created and saved in the mappings tree. You can create a mapping specification under the map using drag and drop method or graphical design.
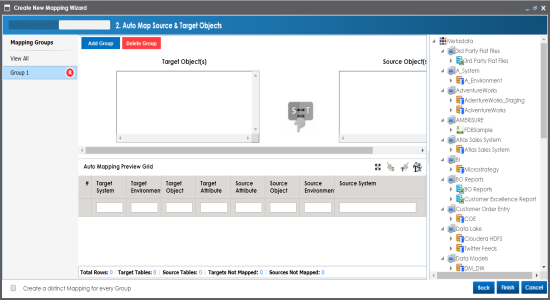
When you click Proceed with Auto Map, you can create mapping specification using auto-map technique.
|
|
|
Copyright © 2021 erwin, Inc. All rights reserved. Copyright © 2021 Quest Software Inc. All rights reserved. All trademarks, trade names, service marks, and logos referenced herein belong to their respective companies. |